Showing posts with label Tutorials. Show all posts

Apr 11, 2014

Mother's Day Cards and a Tutorial


I am in love with this card! It is so dainty and feminine and the ruffle down the side just makes me happy. Want to learn how to add ruffles to your cards too? It couldn't be easier! Our Mother's Day Quote Cards and coordinating printed papers are now available in the store and online. Don't forget to pick up some 8x10 prints to frame for your Mom too... or yourself! 
Happy Friday! Brenda

Mother's Day Quote Cards and coordinating papers are found here


Ruffle Paper Tutorial

Step 1:  Cut a long strip of cardstock and begin to accordion fold, making every other fold half as big as the previous fold.

Step 2: Once your strip is folded, place it on the front of your card, and place under the foot of your sewing machine.

Step 3: Begin to sew your paper, backstitching at the beginning to secure. Keeping your paper strip folded, sew over the folds to create a ruffled look. Backstitch at the end to secure.

Step 4: Assemble the rest of the card as shown, making sure to tuck one side of the quote card under the ruffles, and give to a mother you love.

Mar 28, 2014

Chick Sour Cream Box Tutorial

How cute is this little guy? He’s the perfect size to fill with goodies and give to friends this Easter season. These are a snap to put together, and are less tricky than they look. We are asked several times each day how to create a sour cream box and in this case, a picture is worth a thousand words and smiles... enjoy! 

Assembly
Step 1: Fold along the perforated lines of your flat chick box. Adhere the two eyes and beak to the textured side of your box.
Step 2: Run a small strip of double-sided tape along the edge of one of the two flaps. Fold the remaining flap on top of the other to secure.
Step 4: Gently pinch the sides of your box together as shown. Staple.
Step 5: Adhere chick wings to the sides of your box and fill with your favorite candy.

Step 6: Once your box is filled, take the chick fringe, and insert into the opening of your box. Arrange how you like and staple the box closed as shown.

May 8, 2013

Kraft Pillow Boxes Tutorial


Finally!  The tutorial for those darling little Kraft Pillow Boxes I blogged about last week.  Didn't I tell you they were easy?  I don't know about you but the last thing I want, when I am hosting a party, is to have my time monopolized by party favors.  Rather, I want my favors to be cute, unique and EASY to make.  The assembly for these is so simple,  it could easily be delegated to any little helpers that are hanging around.
Supplies:  die-cuts, American Crafts White Galaxy Marker (medium tip),  and your favorite double-sided craft tape.
Assembly:  Write or draw your message on the box with the American Crafts marker, fold scored edges to prep, place double-sided tape on side flap (as shown) and stick to matching side.  Fold in ends, fill and close.  Done!

May 3, 2013

Summer Garland Tutorial


Really!  Summertime should be this easy as this garland.  Simply glue glitter letters to banners. Adhere pop up squares to single round sun die cut, then place on opposite sun die cut. Press to secure. Thread twine through holes in banners. Attach sun to banner in desired place with clothes pin.  Truly, this assembly is a walk in the park.  And thanks to American Crafts, these letters just sparkle!

May 2, 2013

Blossom Garland Tutorial

Our Blossom garland is really this easy to assemble!  I did it with only one helper, and it cut my time in half (and I had a lot more fun).  However, if you happen to be short on time or helpers, we are happy to make it for you.  Check out our pre-made price here.
To assemble, simply stick an adhesive square in center of one blossom. Place another blossom on top, matching sides, as shown. Repeat this step until all blossoms are paired up.  Next, thread a large crafting needle with the bakers twine. Once threaded, push needle through the center hole of each blossom until all are threaded onto twine. Tie loops at the ends of twine. Separate and space all blossoms evenly along twine. Gently fold pedals of blossoms outward to shape.

Apr 26, 2013

airplane banner tutorial


Check out how easy the airplane banner is to assemble.  We like to keep things easy around here.  That way you can create and enjoy the party!  Of course, we will are happy to do the work for you.  All of our kits can be purchased pre-made.  It's just like having your cake and eating it too!  Who doesn't want that?

Here are the steps: Tie a loop at one end of string. Tie a knot 3 inches below loop. Thread string through hole of a propeller, pulling it down to knot. Score and fold 2 airplanes in half. Match and glue together bottom folded halves. Place string in center of plane, making sure that propeller is against the nose, as shown above. Spread glue on string and open sides of plane. Place third die-cut on top, matching sides. Press to secure. Bend wings to shape. Repeat steps to construct all planes along string. Tie another loop at the other end of string.

Apr 23, 2013

birdhouses


I can't say enough about these cute little birdhouses.  They just beckon the spring weather indoors.  They are also so easy to make, you'll want a dozen!  Simply fold die-cut along scored lines and stick sides together with double-sided sticky tape.  Draw a bead of your favorite craft glue along roof line, and then gently press roof paper down onto it (as shown).  Finish by adhering sweet little flower over birdhouse entrance.  Available as a kit here and premade here. Birdhouse body is made from American Craft Kraft paper .  Birdhouse roof from Crate Paper Maggie Holmes Collection.https://www.pebblesinmypocket.com/searchresults.asp?cat=2247

Apr 18, 2013

chalkboard pillow box tutorial

The creations we can make with our die-cuts are endless.  Take this cute little pillow box, for example.   We cut it out in American Crafts Smooth Card stock, then used an American Crafts White Galaxy Marker (medium tip) to write the message, creating a fun, chalkboard-style, gift box.  Can't you just see these as party favors for a wedding?  Other ideas: teacher gifts, a 50th birthday bash or as a surprise treat box in your kids lunch!  The great news is that it only costs the price of the paper, plus .15¢ per shape, no matter the size... quick turn around and super affordable!  Please contact Pebbles in my Pocket for more pillow box pricing.

Apr 17, 2013

pinwheel mercantile tag banner tutorial


Here it is...just like I promised.  See how simple?  Dab a little hot glue in the center of paper square, fold the corners in, then press them all down with a pencil until cool. Add another dab of hot glue onto the back of a button and quickly place it down in center of pinwheel with pencil as well. Use a good quality white craft glue to adhere pinwheel to tag.  The kit can be found here, and the pre-made banner here.  These also make fun gift tags!  So, if you don't want to purchase entire kit, come on in and you can make one for just $1!

Apr 15, 2013

pretty purse treat box tutorial

Just thought you might like to see how easy this project actually is!  You simply fold tabs along scores and adhere to main panels. Then glue handle strip ends to box interior as shown. Glue rhinestone to the center of the flower cutout, then adhere both to front flap. Flower petals may be folded away from box to add shape and dimension.  Voilà!
Kit can be found herePre-made purses can be found here. We are happy to substitute any printed paper in our store or on our website to create the perfect purse for you!

Nov 21, 2012

basic wood craft tutorial

I hope you find our Basic Wood Crafting Tutorial helpful. Crafting with wood is really fun and easy They make wonderful presents for loved ones and of course for your own home too. If you have any special requests for projects you would like to see us create, please email us at pebblesorders@gmail.com and we will get right back to you for more details. Need a group order? Contact us. Thank you so much!
-Brenda
Our selection of unfinished wood is found here


1. Paint or Stain Wood
Acrylic paint is the best paint for your projects. Foam or regular craft brushes work well. You will need to paint the back, sides and front edges. Painting the entire front where the paper will be placed is not needed. Rinse out your brush right away and you can use it over and over again. Disposable gloves and rags are great to use when applying stain. Use newspapers or plastic to protect your area. Stain comes in oil or water base, both work fine. Follow the directions on can. I use a rag to apply, then place it in a bag for my next project. Allow time to dry.


 2. Tracing Pattern
There are slight variations with hand cut wood or MDF, which makes it difficult to supply you with precut paper pieces. This step is pretty easy and I do this before I paint my wood so I can cut out my paper while the wood is drying. Lay wood on top of paper and trace. Double check to make sure you trace it in the right direction and on the right side of the paper.


3. Cut Paper
Cut your shape inside the drawn line,so that it is slightly smaller than the wood. The paper should not  hand over the edge. Place on top of wood and trim more if needed.


 4. Apply Paper to Wood
Apply a good quality white craft glue to the front of the wood with a small foam brush. Brush from the center to the outer edges so that it doesn't drip down the sides and look messy. Work quickly. Make sure the glue is evenly and thinly applied, and that all edges and corners are covered well. Place paper on top of wood and smooth out towards edges. Press down to make sure there are no air bubbles. Press the edges down several times. If there happens to be some overhanging paper, leave alone, you can sand it off once the glue is dried. Check on it as it dries to make sure the paper does not bubble. Allow to dry. If by chance you get bubbles and want to start over, scrape and sand the paper off and start with the basic bare wood again.


5. Sanding
Sanding your wood project is the best way to add character and softness to it. I like to use a gritty, coarse #80 paper. It quickly and easily breaks down the hard edges and will make your project feel good and worn in your hands. Pay close attention to the edges and corners. You can sand off any paper that is overlapping the edges.


6. Distressing or Aging
I like to distress and age many of my projects. My favorite product to use is the Color Box Chalk Ink. It's pretty easy to use, dries quickly and has a matte finish. You can also use acrylic paint and a dry foam brush to distress your project. Apply a small amount on your brush and wipe off any extra paint. Use light strokes and brush the edges, generally from the outside edges towards the front. Practice on paper until you feel comfortable. You can distress with any color, but I especially like to use browns, grays and black.


7. Protecting your Paper
Once your project is finished you may want to protect the paper. This is optional, but with all that life brings, a very light coat of Modge Podge Matte Finish works well to provide a water resistant barrier. It is very important that your project is completely dry before applying Modge Podge to avoid bubbling the paper (I recommend over night). Apply with a foam or craft brush. I even Modge Podge the paper embellishments. It makes the paper slightly stiff and more durable.


8. Add Finishing Touches
This is where the fun really starts! I often like to keep my projects very plain and simple. However, there are plenty of times when I like to add embellishments of all kinds... buttons, rhinestones, flowers, hardware, photos, twine, yarn, burlap, fabric, tulle, ribbon and more. Some of the adhesives that work well: white craft glue, hot glue, red double stick tape, heavy duty glue dots.


9. All Done!
It's time to come back to Pebbles in my Pocket and start working on another project :)

copyright 2012 Pebbles in my Pocket
www.pebblesinmypocket.com
Pebblesorders@gmail.com
801.226.2632


Nov 17, 2012

christmas tree ornament tutorial

Here is the Christmas Tree Tutorial we created for the girls at eighteen25.blogspot.com. Easy to make and oh! so cute... 
Purchase kits here
Purchase premade christmas trees here
Available for the Silhouette here


Instructions:
-Cut a triangle from printed paper or cardstock. Score and fold in half. Even up both sides with each other.
-Cut / score two more triangles, the same size. The one shown is approximately 3" x 4", but they can easily be smaller or larger.
-Add some white craft glue to half of a folded back (right side is folded inward) and place another folded half on top.
-Once all three are glued together, add white crafting glue to remaining side and down the middle.
-Add a strung silver bell, with red and white bakers twine in the middle as shown and press the two remaining sides together.
-Tie a knot to hang. Trim.

These simple trees can be made from your favorite printed papers. I love to make them from plain cardstock and let my grandkids decorate them with glitter, buttons, sequins and such... creating a memorable keepsake. This would be a great project for a classroom or church group, especially if they were pre-done and ready to decorate with small hands. 

Oct 21, 2012

owl box tutorial


Owl Pillow Box Tutorial

Supplies Needed:
A standard pillow pattern that can be found on the Silhouette or the Cricut.  The one shown is 3” x 4’
Favorite printed paper, cream & golden yellow cardstock
Red Double Stick Tape
White craft glue or small glue dots
Pebbles Inc. Candy Dots (black)
Craft blade

Instructions:
1. Draw small half circles onto the inside of the pillow box with pencil as shown. Cut carefully with craft blade. Fluff upwards. 
2. Place a strip of red double stick tape across the entire side tab of the pillow box, making sure it covers the edge completely. Extra tape can always be folded and pressed back onto the edge as shown. Press together. 
3. Gently fold in the notched tab first, followed by the solid tab on both ends. 
4. Hand cut and attach eyes and beaks as shown. 

These cute little owls make great party favors and place settings gifts. Keep plenty handy and fill with your favorite small gifts, gift card or treats.

Our Owl Pillow Box pattern is now available on the Silhouette here 
Owls are precut and available as Kits here
Owls can also be purchased premade here

Nov 10, 2011

vintage style spool ornament

Hi Friends-
The box arrived today. I know it sounds shallow, but my heart is skipping a beat... must be love! I ordered a few new trees for Pebbles this year. A traditional style, a woodsy style and a vintage style feather tree. The feather tree came today. I am in LOVE with the simpleness of the feather tree... The holiday season is in full swing here at Pebbles as we work on Thanksgiving and Christmas creativity. This year you can look forward to both traditional and vintage style projects and kits... each day we make something new to share to share with you.

Our Vintage Spool Ornament Kits are being assembled as I write this blog. Oh my sweetness! They are filled with such vintage charm that you will find yourself falling in love with them over and over again... sometimes I like to just hold them in my hand. Have you noticed that adding glitter makes everything feel [a lot] more special? Hope this tutorial we created below will give you a starting place for your holiday paper crafting ornaments.
Have a wonderful Friday!
-Brenda
Vintage Spool Tutorial:
Gather your supplies: antiqued wooden spool in your favorite size, 1/4" strip of your favorite sheet of music (include printed notes), dictionary or printed paper, distressing ink or spray, 2 coordinating buttons that fit within the spool end, 8" coordinating bakers twine, 5mm red pom pom, 2 small textured cardstock holly leaves, hot glue gun and favorite white glue [2] Age the paper strip [3] Wrap the paper strip around the spool, securing both ends with a small dab of white craft glue [4] Thread baker's twine through the two holes of one button and pull both strings through bottom end of spool [5] Thread one of the bakers twine threads through two holes on the button as shown. Tie ends of twine together & trim [6] Pull knot in the bakers twine into the center of the spool as shown [7] Pull the bakers twine on the top button evenly up and secure buttons with a small dab of hot glue to the spool as shown [8] Add a small, neat dab of hot glue and arrange the holly leaves as shown. Secure the pom pom with white glue. Add silver Stickles to the rim edge of the spool and let dry.

Jul 14, 2011

Tulle Pom Pom Wand Tutorial

A delightfully easy project that adds the "princess touch" to any princess party, wedding, dress up, and girl time celebrations...


Supplies Needed:
3 yards of 3" netting (cut a 6" spool in half)
Fish line
1 yard of your favorite flowing ribbon
Scissors
Hot glue gun
12" wood skewer

Step 1:
The easiest way to cut the 6" netting in half is to lay in straight and flat on a table and cut evenly down the center.

Step 2:
Beginning at one end, scrunch the netting into folds. Make sure the keep the edges as even as possible.

Step 3:
Cut a 12" piece of fish line and tie several knots tightly around the center. This step is easier with two people - the tighter the knot, the better! Fluff your pom pom until it is nice and full. Cut the fish line short and also trim and strangling pieces of netting.

[steps 1-3]
Step 4:
Place a dab of hot glue on the tip of the skewer and insert into the center of the pom pom. Hold tightly together until glue cools.

Step 5:
Tie the ribbon into a loose bow and pull loops away from the center. Add a dab of hot glue to the top center of the knot and place towards the top of the skewer, by the netting. Be sure to adhere the ribbon to the skewer and not the netting for the best adhesion.

Step 6:
Fluff the tulle ball until it is like top image shown.

[steps 4-6]
This project is also available as a kit!

Jul 7, 2011

Paper Blossom Bouquet Tutorial

Supplies Needed:
Printed cardstock-weight paper
Green wrapped wires
Hot glue gun
Scissors
Stapler
White vase

Step 1:
Cut out 2 of each size flower: 2½”, 3”, 3½”

Step 2:
Carefully pull the cardstock weight printed paper apart to create two thinner sheets. Start by pulling two petals apart toward the center and then peel the rest off in one slow movement. This technique helps create a more real looking blossom.


Step 3:
Fold the petals in half and staple together as show
n. Fold one of the 2½” petals into fourths and staple as shown.

Step 4:
Crinkle the petals in your hand
.

Step 5:
Carefully open up the petals
.

[steps 1-5]

Step 6:
Set aside one 3½” petal for later. Adhere the remaining 3½” peta
ls together using hot glue, ending with the smallest triangle petal on top. Press together firmly.

Step 7:
Bend the ½” end of your green wire into a ninety degree angle. Poke the remaining 3½” petal in the center from behind with the angled green wire.

Step 8:
Adhere the bent ½” portion of the green wire flat onto the back of the stack of petals using hot glue
. Make sure the green wire stays perpendicular to the flower to act as a stem. Thread the remaining 3½” petal onto the back of the flower to secure and hide the green wire. Hold securely until hot glue is firm.

Step 9:
Your blossom will look flat and crushed, but no worries…

[steps 6-9]

Step 10:
Begin to pull the petals toward the center and your blossom will be perfect! Cut the wire to the appropriate length for your vase.

Optional:
You can skip the wire steps if you would like your blossom to be used without a wire. In this case, just glue the remaining petal onto the back like the others. You can also add Stickles or glitter to the edges and a rhinestone in the center if you wish for extra sparkle.

Apr 4, 2011

Magical Princess Wand Tutorial

Every girl, sometime in her life dreams of being a princess. This princess wand is perfect for encouraging those dreamy imaginations! Perfect for parties or just playtime and dress up!

1. With a pencil, lightly trace the spiral pattern onto cardstock or printed paper. Cut out.


2. Begin rolling up the spiral, beginning at the outside edge, making sure the first center rolls are extra tight. This will be the center of your flower. Keep rolling until you are at the end of your spiral.

3. Let go of your flower and let it loosen up. Place a small dab of hot glue on bottom of spiral and set the rose down on table, placing your finger on top of flower to press securely down as it dries. Be careful not to burn yourself! Fold leaves in half to create crease and open up.


4. Place all ribbon neatly together and tie securely 1” from the top of the wand with a half knot. Keep in place with a couple dabs of hot glue near the knot. Glue flowers onto wand as shown. Add leaves after. Add a little princess sparkle by placing ‘Crystal’ Stickles to the edges of the roses. (Or use Mono-Adhesive glue and white or clear glitter)


Don't want to come up with the supplies on your own?? We've got it all set up in a kit right here and ready to be assembled!

Mar 16, 2011

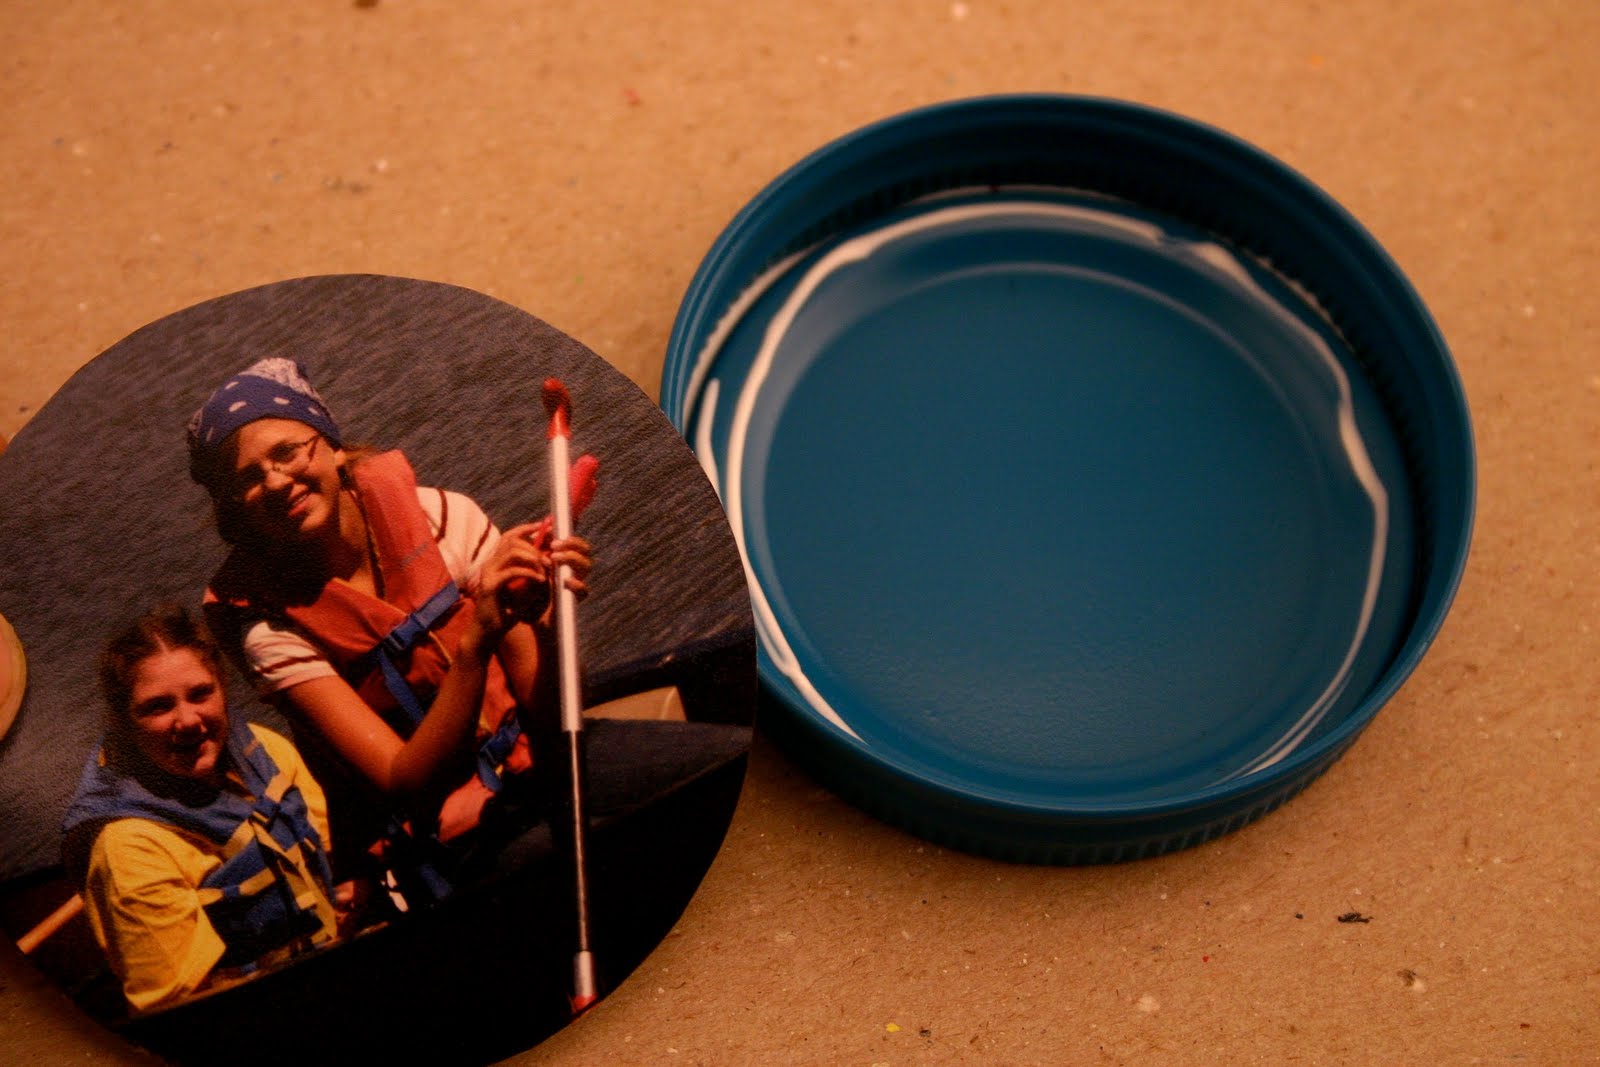
How to: Canning Lids Frame Magnet

This little project will be perfect for a Girl's Camp craft, best friend gift, girls birthday party craft, summer activity, etc. I could probably go on for days! Basically, I'm saying you need to make these RIGHT NOW!! They are so cute and personal.


Supplies Needed:
- Canning jar lids & rings
- Spray paint in your favorite colors
- E6000 adhesive
- Tombo Mono liquid adhesive
- 3D Crystal Lacquer or Diamond Glaze
- Strong Neodymium magnets
- Favorite photos
- Scissors
- Permanent Marker


Step 1: Spray paint the canning lids on both sides. (Tip: spray the lids inside a cardboard box to catch any over spray) Set aside to dry.


Step 2: Glue the lid onto the ring to create a good seal.


Step 3: Using the lid as a template, trace the shape onto a photo and cut out. Add glue to the lid and place photo on top. Set aside to dry.


Step 4: Add any embellishment and stickers you would like. (Magazine letters add some fun and inexpensive character!) Fill in the lid area with a light layer of 3D Crystal Lacquer or Diamond Glaze. Cover the entire area and DO NOT shake the bottle before applying as this will create more air bubbles. If you do have any air bubbles, remove any air bubbles with a pin. Set aside to dry until it dries clear. Add ribbon and embellishments, if desired.


Step 5: Glue a strong neodymium magnet to the back with a dab of E6000. Allow to dry for 24 hours before using.
”related